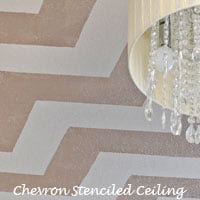
Learn How To Stencil a Fun Pattern on Your Ceiling
Cutting Edge Stencils Gives Simple Steps For Painting a Ceiling with a Stencil
Good morning, my home decorating enthusiasts! We want you to stop reading for just a moment and take a look up. What do you see? Is there a plain white ceiling staring back at you? Ahhh, we thought so! Is it screaming for a little bit of color or possibly even a fun pattern? We KNEW it! Have no fear because
Cutting Edge Stencils is here! We want you to consider using our
stencils to add a fun pattern to your ceiling! Dare us to tempt you? Take a look at this!
If you follow us on Pinterest then you've seen that we've been stalking stenciled ceilings lately. We're just in awe of their jaw dropping beauty. So we fell head over heels for Sarah's
Aspen Allover Stenciled ceiling in gray and white. We could just lay in bed all day and stare at this stunning ceiling!

Then
Kristen Duke Photography pulled at our heartstrings with this totally adorable
Lily Scroll Stenciled little girl's room. The vibrant colors combined with the ubber fun pattern on the ceiling makes this a dream bedroom for any kid!

From bedrooms to bathrooms, it appears that stenciling a ceiling has actually become quite popular! We love the pop of pattern this
Hand Forged Stencil adds to this gray and white bathroom.

Love dramatic colors and bold patterns? Then you'll be rushing to recreate this gold
Casablanca stenciled ceiling in this black bathroom that we created by The Welch Abode!

Convinced yet? We knew you would be! Here's the deal, we don't want to leave you hanging now that you're in love with the idea of stenciling that boring white ceiling. So we've put together a little how-to below based on imagery found on
HGTV Remodels.

Material Checklist
Here's the 411 on how-to stencil your own ceiling (imagery from HGTV Remodels)...

1.
Get Started: Make sure you have all your materials listed above.
2.
Prepare the Surface: Use a sponge to clean your ceiling with a solution of water and dish washing liquid. This will ensure that all of the dust and dirt off your ceiling.
3.
Secure the Stencil: When you’re stenciling a ceiling, you can use either painter’s tape or spray adhesive to secure and reposition your stencil as you paint the pattern. Stenciling a ceiling is more tricky because you’re working against gravity. Here's a little trick! Use a spray adhesive for stenciling the ceiling and then add a few pieces of painter’s tape around the edge of the stencil to keep it firmly in place. You’ll want to start your stencil on a section of the the ceiling that lets you paint an uninterrupted column of the pattern. Then you’ll have a perfect pattern from which you can extend out from.
4.
Start Stenciling: Pour some paint onto a plate or paint tray. Then using your stencil brush dip it into the paint. Blot off the excess paint onto your folded paper towel until the brush looks almost dry. It is key to use as little paint as possible when stenciling. Too much paint will cause the design to bleed and smudge. Always start with the edges. Use a dabbing motion with your stencil brush to start painting in from the edges of your design. You'll use the stencil brush for filling in any gaps where the ceiling meets the trim.
5.
Fill in With Paint: Use the roller to fill in the stencil. When you start applying the roller to the ceiling, you should see no visible paint on the roller surface — it should look almost dry. Let the paint dry, and then apply a second coat.
6.
Tape, Paint, Repeat! Reposition your stencil, lining it up with the painted pattern. Continue on with the pattern. This stencil comes with an additional top edge stencil — the upper part of the design cut as a smaller separate stencil. This helps make it easy to fill the gaps by your ceiling line after the main section is stenciled.
Step back, look up and admire your gorgeous stenciling job!!!

Tell us: Would you dare to stencil a fun pattern on your ceiling? Leave us a comment below!
Haven't had enough stenciling fun?
- Shop our stencils and find the perfect one for your ceiling project!
- Follow us on Pinterest to see awesome inspirational photos!
- Have you completed a stencil project? Come share it on Facebook!
Thanks for reading, and happy stenciling!
Michelle and the Cutting Edge Stencils Crew
 Then Kristen Duke Photography pulled at our heartstrings with this totally adorable Lily Scroll Stenciled little girl's room. The vibrant colors combined with the ubber fun pattern on the ceiling makes this a dream bedroom for any kid!
 From bedrooms to bathrooms, it appears that stenciling a ceiling has actually become quite popular! We love the pop of pattern this Hand Forged Stencil adds to this gray and white bathroom.
 Love dramatic colors and bold patterns? Then you'll be rushing to recreate this gold Casablanca stenciled ceiling in this black bathroom that we created by The Welch Abode!
 Convinced yet? We knew you would be! Here's the deal, we don't want to leave you hanging now that you're in love with the idea of stenciling that boring white ceiling. So we've put together a little how-to below based on imagery found on HGTV Remodels.

 1. Get Started: Make sure you have all your materials listed above.
2. Prepare the Surface: Use a sponge to clean your ceiling with a solution of water and dish washing liquid. This will ensure that all of the dust and dirt off your ceiling.
3. Secure the Stencil: When you’re stenciling a ceiling, you can use either painter’s tape or spray adhesive to secure and reposition your stencil as you paint the pattern. Stenciling a ceiling is more tricky because you’re working against gravity. Here's a little trick! Use a spray adhesive for stenciling the ceiling and then add a few pieces of painter’s tape around the edge of the stencil to keep it firmly in place. You’ll want to start your stencil on a section of the the ceiling that lets you paint an uninterrupted column of the pattern. Then you’ll have a perfect pattern from which you can extend out from.
4. Start Stenciling: Pour some paint onto a plate or paint tray. Then using your stencil brush dip it into the paint. Blot off the excess paint onto your folded paper towel until the brush looks almost dry. It is key to use as little paint as possible when stenciling. Too much paint will cause the design to bleed and smudge. Always start with the edges. Use a dabbing motion with your stencil brush to start painting in from the edges of your design. You'll use the stencil brush for filling in any gaps where the ceiling meets the trim.
5. Fill in With Paint: Use the roller to fill in the stencil. When you start applying the roller to the ceiling, you should see no visible paint on the roller surface — it should look almost dry. Let the paint dry, and then apply a second coat.
6. Tape, Paint, Repeat! Reposition your stencil, lining it up with the painted pattern. Continue on with the pattern. This stencil comes with an additional top edge stencil — the upper part of the design cut as a smaller separate stencil. This helps make it easy to fill the gaps by your ceiling line after the main section is stenciled.
Step back, look up and admire your gorgeous stenciling job!!!


