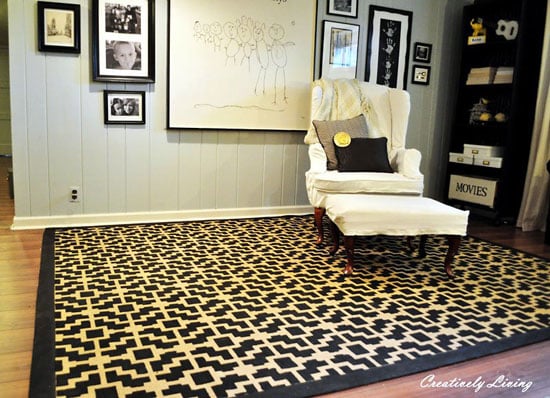
Home Decor Stencil Tutorial: DIY Designer Rug!

DIY Stencils for Designer Home Decor
Stencils offer endless possibilities when it comes to DIY home decor projects. We recently purchased a drab sisal rug that needed some major attention, and decided on the Shipibo Allover stencil to give our rug a serious DIY makeover. If you are wanting to upgrade your home decor but don't have the funds, this rug stenciling tutorial is a great place to start. You can find great deals on large sisal rugs and then buy a stencil to bring your decor to the next level instead of spending thousands on a designer rug. Below is the easy how-to tutorial on achieving our DIY stenciled rug:
Stenciling Supplies
This DIY home decor project doesn't require much more than Benjamin Moore paints and your favorite stencil. We have hundreds of stencils to choose from so be sure to browse our website and pick out the perfect stencil for your space. Here is what you'll need for your sisal rug makeover:- Stencil (we used the Shipibo Allover stencil)
- Large Stencil Brush
- Benjamin Moore Brown Horse paint
- Paint Can Opener
- Blue Painters Tape
- Styrofoam plate
- Paper Towels

Prepping the Rug for Stenciling
Before stenciling you want to mask off the rug binding with your blue painters tape. This will create a nice border around the stencil pattern. Make sure that the tape fully covers the binding so that you don't get any paint on it. Also, press the tape down nicely especially on the edge that meets the rug so that you don't have paint bleed through.

Place Your Stencil and Stencil Away!
Once your sisal rug has been taped off properly, it is time to place your stencil! You want to line up the edge of the stencil design with the edge of the tape on both the top and right side. In the photo above, you can see how the stencil sheet overlaps the blue tape because I have lined up the Shipibo stencil pattern with the edges and not the actual stencil sheet. Once your stencil is nicely placed, use some blue painters tape to hold it in place. Pour some Benjamin Moore Brown Horse paint onto your styrofoam plate, load your brush, offload the excess paint and stencil away! For more detailed instructions on how to stencil be sure to check out our how-to stencil tutorial videos.

Check your Stenciling
Before getting too far into any DIY stenciling project, you want to check your work to make sure you are on the right track. Without removing any tape, lift up a corner to check your work. If you like what you see, lay the corner back down and continue. Want it to be little bit darker? Make the proper adjustments so that you get the look you want. I made the mistake of starting out too dark so that when I realized I could get a more subtle vintage look using a dense foam roller, it was too late because you can't really remove paint.

Another Stenciled Look
Above you can see another look you can achieve by using a dense foam roller instead of a large stencil brush. By the time I discovered this alternative look it was too late because I started out using a stencil brush and getting very solid bold coverage. I would advise to start out light, check to see how it looks and then you can always make it darker. I love the way the sisal rug turned out with bold solid coverage but as a side note, if you want something less modern and bold, try using a dense foam roller to get a subtle vintage look instead. The dense foam roller technique also happens to be much faster and can be achieved in under an hour. Either way, it was well worth the couple of hours it took to get our beautiful results as well.

Aligning Your Stencils
Once you have completed your first stencil application and you have checked to make sure you like the results, lift up your stencil and re-place it to interlock the pattern (refer to the image above). Once you have aligned your stencil for the next application, tape it place and continue to stencil.

Almost Done with the Stenciling!
Continue interlocking the stencil pattern as you move across and down your rug. Before you know it you will be stenciling your last corner! Doesn't this sisal rug already look stunning? Almost finished!

Stenciling the Edges
Once you have stenciled the majority of your sisal rug, all you need to do is fill in the edges. Simply line up your stencil with the pattern on the rug and fill in any edges that have missing elements of the design and voila! Rug stenciled, check. Edges filled, check. Now remove the blue tape covering the binding and you are finished!
DIY Home Decor Masterpiece
We really couldn't be happier with how our DIY stenciled sisal rug turned out. Doesn't it just transform this room? You can see from our tutorial how easy it is to achieve this stunning look! All you need is a couple of hours, your favorite stencil and a great Benjamin Moore paint color to match and this rug can be yours. It's really that easy. Want to see more about our DIY stenciled rug makeover? Check out our how-t0 video: If your creative juices are flowing and you've been inspired to take on your own stenciled DIY home decor, this is what you can do:- Stop by our website to purchase stencils
- Browse the Benjamin Moore website for awesome color combinations
- Go to our Pinterest page to get more project ideas
- Check out our Facebook page for updates and special promotions
- View our extensive stencil video tutorials
Thanks for stopping by!
Stay tuned for more daily posts.
Yours truly
~Gabi and the Cutting Edge Stencils crew


