Accessibility Statement
Our Commitment to Accessibility
We are committed to ensuring digital accessibility for people with disabilities. We are continually improving the user experience for everyone, and applying the relevant accessibility standards to help users with various disabilities access our website effectively.
Compliance Status
Our website strives to conform to the Web Content Accessibility Guidelines (WCAG) 2.1 Level AA standards. We also aim to be compliant with the Americans with Disabilities Act (ADA) and the European Accessibility Act requirements. These guidelines and regulations explain how to make web content more accessible to people with a wide range of disabilities. We acknowledge that some aspects of our website may not yet achieve full compliance, and we are actively working to address these areas.
Accessibility Features Available
Our website implements the Accessibly App, which provides a variety of tools to enhance website accessibility:
Visual Adjustments
- Bigger Text: Increase text size up to 3x for better readability (WCAG 2.1/1.4.4)
- Bigger Cursor: Enhanced cursor visibility for easier navigation
- Color Adjustments: Invert colors, adjust contrast, brightness, and saturation
- Grayscale Mode: Convert website to grayscale for users with visual impairments
- Hide Images: Reduce visual distractions for easier reading
Reading and Navigation Aids
- Reading Line: Adds a guide line to help follow text
- Reading Mask: Places a mask over text to isolate lines and enhance focus
- Readable Fonts: Converts to highly legible fonts for better comprehension
- Highlight Links: Makes links more prominent for easier navigation
- Dyslexic Fonts: Special typography for users with dyslexia
- Page Structure: Simplified layout options for easier navigation
Assistive Technologies
- Keyboard Navigation: Full website control using keyboard (Tab, Shift+Tab, Enter)
- Alt Text for Images: AI-generated image descriptions where manual ones aren't provided
- Read Page Aloud: Text-to-speech functionality
- Stop Animations: Pause motion content for users with vestibular disorders
Limitations and Feedback
Despite our best efforts to ensure accessibility, there may be some limitations. Content provided by third parties, user-generated content, or certain legacy pages may not be fully accessible. We are continuously working to improve our website's accessibility.
We welcome your feedback on the accessibility of our website. If you encounter any barriers or have suggestions for improvement, please contact us. We are committed to addressing these issues promptly.
Technical Information
The accessibility features on this website are provided through the Accessibly App, which utilizes several technologies including HTML, CSS, JavaScript, and various frameworks to enhance accessibility. Our implementation strives to be compatible with major screen readers and assistive technologies.
Legal Disclaimer
While we strive to adhere to WCAG 2.1 Level AA standards and provide accessible content, we cannot guarantee that our website will be accessible to all users under all circumstances. This website is provided 'as is' without any representations or warranties, express or implied.
In no event shall we be liable for any damages arising from or related to:
- Inability to access or use the website
- Any alleged non-compliance with accessibility laws or regulations
- Any disruption or errors in the functionality of accessibility features
By using this website, you agree to hold us harmless from any claims related to website accessibility issues. We are committed to addressing accessibility barriers in good faith but cannot guarantee immediate resolution in all cases.
Contact Us
If you have any questions about our accessibility efforts or encounter any barriers while using our website, please contact us.
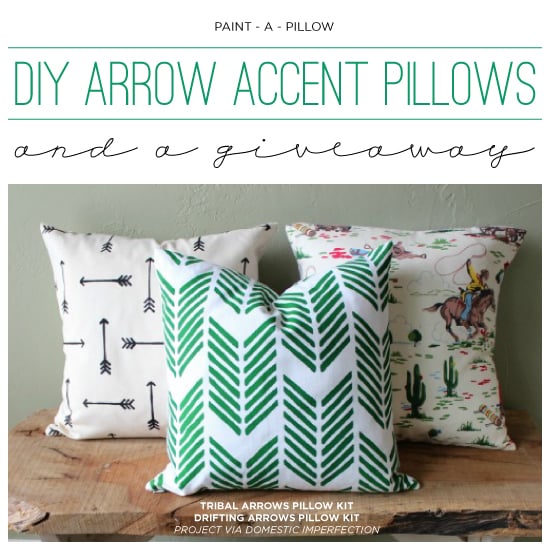
 First up, we'd like to welcome back Erin. She selected two great geometric patterns, the Drifting Arrows and the Geo. Then she chose white pillow covers and several Jacquard paints in black, neutral gray, and raw sienna. She was excited when she opened the kit and realized it was ready to go. Erin says, "As for the actual part of painting your pillow- it is so super easy!" she used a dense foam roller to paint the arrow pattern in black and a stencil brush to paint the geometric shape pattern in all three colors. Once the paint was dry, she inserted the pillow insert and was ready to snap some pretty pictures. She comments, "I think this could make a fun night with your girlfriends who are afraid of getting a little bit crafty. " We totally agree! Here are the pillows the Erin crafted:
 Next up is Tricia. She ordered the Otomi Rooster Paint-A-Pillow kit with a white pillow cover and neutral gray fabric paint. Tricia wrote, "This was a great product to work with. I love the way the kit came packaged and that I could feel super creative yet it only took about 30 minutes from start through clean up to complete a pillow." Once the pillow was painted, she decided to put her own personal twist on it by embroidering the stenciled detail.
 Once the project was complete, Tricia rinsed off the stencil and was ready to use it again! She had a piece of canvas laying around and gold craft paint. She taped her stencil to the canvas and painted the Otomi Rooster pattern onto the fabric. Once it was complete, she placed it into a white frame. Easy peasy DIY wall art for her daughter's room. Oh and yes that is our Little Diamonds stencil staring back at you behind the wall art.
 Tell us: Which one of these Paint-A-Pillow projects is your favorite? Leave us a comment below!
Looking for more Paint-A-Pillow fun?


