Paint The Perfect Pillow To Match Your Decor
Learn How to Paint the Perfect Accent Pillow Using Paint-A-Pillow
Happy Tuesday, my crafty friends. Brr... it sure is chilly here in Northern NJ. This wintry weather has the
Cutting Edge Stencils crew stuck inside. Do you know what we love to do when we're stuck inside? Stencil! Today we have the perfect project from
Paint-A-Pillow to keep you entertained on a snow day. Come take a look.

We'd like to introduce Sara, the DIY home decor enthusiast behind the blog
Sincerely Sara d. We have been following Sara's blog for awhile now and absolutely love her creativity. We reached out to see if she wanted to try Paint-A-Pillow and were super excited when she said yes. Sara ordered the
Funky Wheel Paint-A-Pillow kit with a white pillow cover, Jacquard Fabric Paint in several colors, an extra pillow cover, and
bronze studs. First, we'll give you a quick glimpse of her stenciled accent pillows and then we'll fill you in on all the juicy details.

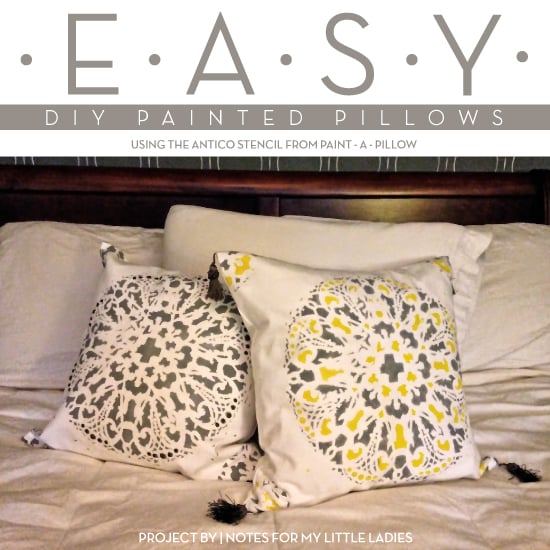
Pick that jaw up off the ground. This accent pillow is not only gorgeous, it's also super easy to recreate. It all starts with the Paint-A-Pillow kit. This kit includes everything you need to make one gorgeous accent pillow.

Sara opened the package and read through the simple instructions that were included in the kit.

Sara planned to make two pillows. For her first pillow, she chose to paint the funky geometric design in neutral gray, turquoise, yellow ochre, and orange. When painting multiple colors, it's easier to use the stencil brush. We always recommend starting with the lightest color. Sara painted the neutral gray on her pillow.

** If you're recreating this at home, be careful not to overload the stencil brush with paint. Brush off the excess paint onto a folded paper towel until the brush looks almost dry. The key to stenciling is using as little paint as possible. Too much paint will cause the design to bleed and smudge.
Once the gray was painted, she paint the turquoise hue.

Sara continued painting the pillow with her selected colors.

Once the entire pillow cover was painted, Sara peeled back the metal tabs holding the stencil. She commented, "The stencil is held in place with these metal prongs. It’s amazing. Your stencil doesn’t move."

Now she was ready for the fun part, embellishing her pillow! Sara decided to dress up her pillows with bronze studs. She said, " The pillow cover comes with a cardboard insert. Since I wanted to add some brass studs, I left the cardboard in. I just used my thumb to press the brackets through the fabric and on into the cardboard. "

Then she flipped the fabric over and pushed the prongs down with the flat end of a pen.

When the pillow cover was complete, Sara stuffed the pillow inserts into the painted covers. And there you have it! That's how she created these gorgeous accent pillows.


We love how the bronze studs enhance the painted pillow.

Now Sara didn't stop with just one pillow. She cleaned off her stencil in a sink and created a second accent pillow. To see the step by step tutorial to recreate this beauty, please visit her
blog. Oh, and while you're there enter the Paint-A-Pillow
giveaway!
 Tell us: What color would you stencil the Funky Wheel pattern? Leave us a comment below!
Looking for more Paint-A-Pillow fun?
- Shop our Paint-A-Pillow kits and find the perfect design for your home!
- Follow us on Pinterest to see awesome inspirational photos!
- Have you completed a pillow project? Come share it on Facebook!
Thanks for reading, and happy stenciling!
Michelle and the Paint-A-Pillow Crew
 We'd like to introduce Sara, the DIY home decor enthusiast behind the blog Sincerely Sara d. We have been following Sara's blog for awhile now and absolutely love her creativity. We reached out to see if she wanted to try Paint-A-Pillow and were super excited when she said yes. Sara ordered the Funky Wheel Paint-A-Pillow kit with a white pillow cover, Jacquard Fabric Paint in several colors, an extra pillow cover, and bronze studs. First, we'll give you a quick glimpse of her stenciled accent pillows and then we'll fill you in on all the juicy details.
 Sara opened the package and read through the simple instructions that were included in the kit.
 Sara planned to make two pillows. For her first pillow, she chose to paint the funky geometric design in neutral gray, turquoise, yellow ochre, and orange. When painting multiple colors, it's easier to use the stencil brush. We always recommend starting with the lightest color. Sara painted the neutral gray on her pillow.
 ** If you're recreating this at home, be careful not to overload the stencil brush with paint. Brush off the excess paint onto a folded paper towel until the brush looks almost dry. The key to stenciling is using as little paint as possible. Too much paint will cause the design to bleed and smudge.
Once the gray was painted, she paint the turquoise hue.
 Sara continued painting the pillow with her selected colors.
 Once the entire pillow cover was painted, Sara peeled back the metal tabs holding the stencil. She commented, "The stencil is held in place with these metal prongs. It’s amazing. Your stencil doesn’t move."
 Now she was ready for the fun part, embellishing her pillow! Sara decided to dress up her pillows with bronze studs. She said, " The pillow cover comes with a cardboard insert. Since I wanted to add some brass studs, I left the cardboard in. I just used my thumb to press the brackets through the fabric and on into the cardboard. "
 Then she flipped the fabric over and pushed the prongs down with the flat end of a pen.
 When the pillow cover was complete, Sara stuffed the pillow inserts into the painted covers. And there you have it! That's how she created these gorgeous accent pillows.

 We love how the bronze studs enhance the painted pillow.
 Now Sara didn't stop with just one pillow. She cleaned off her stencil in a sink and created a second accent pillow. To see the step by step tutorial to recreate this beauty, please visit her blog. Oh, and while you're there enter the Paint-A-Pillow giveaway!
 Tell us: What color would you stencil the Funky Wheel pattern? Leave us a comment below!
Looking for more Paint-A-Pillow fun?


