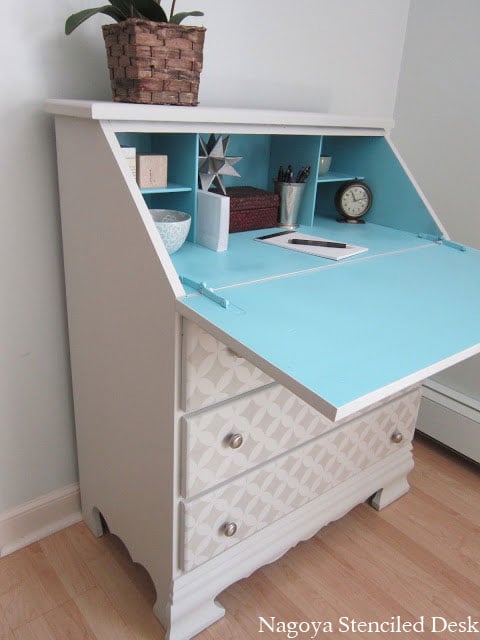
Adorable Stencil Ideas using Moroccan Stencils
Stencil Idea: Paint Your Home Decor with Moroccan Stencils
Happy New Year,
DIY daredevils! Here's to hoping 2013 brings you the ambition and motivation to do all the things you never thought you could in past years!
Cutting Edge Stencils' resolution for the new year is to provide you with the most enticing
stencil ideas and the best quality
stencils around! Basically, we resolve to keep doing what we've been doing in order to help you decorate your home the way you've always dreamed!
Our first
how-to project of 2013 will be transforming your
home decor with our
Casablanca Craft Stencil! This
stencil design is super versatile and looks just fabulous in any room of your home, adding a pop of design and Moroccan style! Today, we're absolutely gushing to teach you how to bring this Moroccan Stencil into your
home decor and impress yourself with your
DIY abilities!
DIY Casablanca Headboard

Jamie, from
The Baeza Blog,
stenciled her very own headboard to spruce up her bedroom! She started from scratch, purchasing a 1 inch thick piece of
Medium-Density Fibreboard at Home Depot, and had it cut to fit the size of her mattress. Jamie then painted the wood with two coats of white paint, let it dry overnight, and got to
stenciling the next morning. Using a clip on level, a dense foam roller, and some painters tape, Jamie began
stenciling with
Thunder Gray paint from Valspar at Lowe's. She used two coats of paint to create this gorgeous colored
Moroccan design, and had absolutely no bleed through since she used very little paint on her roller (very important)!
After Jamie finished
stenciling, she then got to work on the framework of the headboard. To create the framework, Jamie purchased 4x4 wood posts to act as the legs of the headboard. She used gorilla glue and a few screws to adhere the "legs" to the side edges of the
stenciled board, making sure the edges of the legs and the board were precisely lined up. After that, Jamie used gorilla glue and a mallet to fasten a 2x4 wood board as a top boarder piece that laid between the legs. A trim piece was then attached the same way over directly over that. The final piece of wood trim was the sanded and rounded 2x6 slab that rests over the top of the trim and legs. Jamie's finishing touch of the framework was to paint it white to match the background of the
stenciled board.
 DIY Moroccan Dresser
Our
DIY visionary Sarah, from the blog
Alderberry Hill, stenciled this adorable Moroccan dresser with our
Casablanca Craft Stencil! She used frog tape and her hands to hold down the
stencil design onto the top of the dresser as she painted with white acrylic paint! Sarah easily lined up the design across the flat top surface and used a stencil brush to complete the flawless Moroccan look with our
stencil! (Just an FYI: our Casablanca designs are meant for you to fill the large openings with paint; the outlining lines will be your background color) Check out Sarah's process below!
 DIY Stenciled Lamp Shade
Creative queen, Ashley, from the blog
Mommy by Day Crafter by Night, added a little color and dimension to her plain, white lamp shade with our
Casablanca Craft pattern and some turquoise paint! Although Ashley was a tad bit shy about the secrets to her succes, we can safely assume she used painters tape and a stencil brush to help her create the design! If you plan on painting your own lampshade, remember to use little paint on your brush, offloading it onto a paper towel before you begin! This is a great project for a first time stenciler, and the results are adorable!
 For more stencil ideas:
- Visit our Facebook page for customer pictures and links to tutorials!
- Read our blog to learn step-by-step instructions on stencil projects!
- Create a Home Decorating board on Pinterest and pin our photos!
Thanks for reading, and happy stenciling!
Melissa and the Cutting Edge Stencils Crew
 Jamie, from The Baeza Blog, stenciled her very own headboard to spruce up her bedroom! She started from scratch, purchasing a 1 inch thick piece of Medium-Density Fibreboard at Home Depot, and had it cut to fit the size of her mattress. Jamie then painted the wood with two coats of white paint, let it dry overnight, and got to stenciling the next morning. Using a clip on level, a dense foam roller, and some painters tape, Jamie began stenciling with Thunder Gray paint from Valspar at Lowe's. She used two coats of paint to create this gorgeous colored Moroccan design, and had absolutely no bleed through since she used very little paint on her roller (very important)!
After Jamie finished stenciling, she then got to work on the framework of the headboard. To create the framework, Jamie purchased 4x4 wood posts to act as the legs of the headboard. She used gorilla glue and a few screws to adhere the "legs" to the side edges of the stenciled board, making sure the edges of the legs and the board were precisely lined up. After that, Jamie used gorilla glue and a mallet to fasten a 2x4 wood board as a top boarder piece that laid between the legs. A trim piece was then attached the same way over directly over that. The final piece of wood trim was the sanded and rounded 2x6 slab that rests over the top of the trim and legs. Jamie's finishing touch of the framework was to paint it white to match the background of the stenciled board.
 DIY Moroccan Dresser
Our DIY visionary Sarah, from the blog Alderberry Hill, stenciled this adorable Moroccan dresser with our Casablanca Craft Stencil! She used frog tape and her hands to hold down the stencil design onto the top of the dresser as she painted with white acrylic paint! Sarah easily lined up the design across the flat top surface and used a stencil brush to complete the flawless Moroccan look with our stencil! (Just an FYI: our Casablanca designs are meant for you to fill the large openings with paint; the outlining lines will be your background color) Check out Sarah's process below!
 DIY Stenciled Lamp Shade
Creative queen, Ashley, from the blog Mommy by Day Crafter by Night, added a little color and dimension to her plain, white lamp shade with our Casablanca Craft pattern and some turquoise paint! Although Ashley was a tad bit shy about the secrets to her succes, we can safely assume she used painters tape and a stencil brush to help her create the design! If you plan on painting your own lampshade, remember to use little paint on your brush, offloading it onto a paper towel before you begin! This is a great project for a first time stenciler, and the results are adorable!
 For more stencil ideas:


