Are you sure you want to hide the widget forever? If you need it back, please clear your cookies.
Content
Colors
Color Filters
Navigation
Selected Language
English (United States)
All Languages
Accessibility Statement
Our Commitment to Accessibility
We are committed to ensuring digital accessibility for people with disabilities. We are continually improving the user experience for everyone, and applying the relevant accessibility standards to help users with various disabilities access our website effectively.
Compliance Status
Our website strives to conform to the Web Content Accessibility Guidelines (WCAG) 2.1 Level AA standards. We also aim to be compliant with the Americans with Disabilities Act (ADA) and the European Accessibility Act requirements. These guidelines and regulations explain how to make web content more accessible to people with a wide range of disabilities. We acknowledge that some aspects of our website may not yet achieve full compliance, and we are actively working to address these areas.
Accessibility Features Available
Our website implements the Accessibly App, which provides a variety of tools to enhance website accessibility:
Visual Adjustments
Bigger Text: Increase text size up to 3x for better readability (WCAG 2.1/1.4.4)
Bigger Cursor: Enhanced cursor visibility for easier navigation
Color Adjustments: Invert colors, adjust contrast, brightness, and saturation
Grayscale Mode: Convert website to grayscale for users with visual impairments
Hide Images: Reduce visual distractions for easier reading
Reading and Navigation Aids
Reading Line: Adds a guide line to help follow text
Reading Mask: Places a mask over text to isolate lines and enhance focus
Readable Fonts: Converts to highly legible fonts for better comprehension
Highlight Links: Makes links more prominent for easier navigation
Dyslexic Fonts: Special typography for users with dyslexia
Page Structure: Simplified layout options for easier navigation
Assistive Technologies
Keyboard Navigation: Full website control using keyboard (Tab, Shift+Tab, Enter)
Alt Text for Images: AI-generated image descriptions where manual ones aren't provided
Read Page Aloud: Text-to-speech functionality
Stop Animations: Pause motion content for users with vestibular disorders
Limitations and Feedback
Despite our best efforts to ensure accessibility, there may be some limitations. Content provided by third parties, user-generated content, or certain legacy pages may not be fully accessible. We are continuously working to improve our website's accessibility.
We welcome your feedback on the accessibility of our website. If you encounter any barriers or have suggestions for improvement, please contact us. We are committed to addressing these issues promptly.
Technical Information
The accessibility features on this website are provided through the Accessibly App, which utilizes several technologies including HTML, CSS, JavaScript, and various frameworks to enhance accessibility. Our implementation strives to be compatible with major screen readers and assistive technologies.
Legal Disclaimer
While we strive to adhere to WCAG 2.1 Level AA standards and provide accessible content, we cannot guarantee that our website will be accessible to all users under all circumstances. This website is provided 'as is' without any representations or warranties, express or implied.
In no event shall we be liable for any damages arising from or related to:
Inability to access or use the website
Any alleged non-compliance with accessibility laws or regulations
Any disruption or errors in the functionality of accessibility features
By using this website, you agree to hold us harmless from any claims related to website accessibility issues. We are committed to addressing accessibility barriers in good faith but cannot guarantee immediate resolution in all cases.
Contact Us
If you have any questions about our accessibility efforts or encounter any barriers while using our website, please contact us.
Getting your table ready for stenciling is important but easy. First, if your table has a glass top like ours did, remove it and set it to the side. This will make the project so much simpler than trying to work around the glass. Next, scuff the surface of your table with a Scotch Brite finishing pad. This will help the paint to stick to your table when stenciling!
With a bit of denatured alcohol on a paper towel, remove any dust or grease that might be on the surface of the table. No need for your paper towel to be soaked with denatured alcohol. Only a small amount is necessary.
For all of the supplies used for this stencil project, check the list below:
Finding the midpoint of your table before stenciling will help ensure your stencil pattern is centered. The easiest way to find the midpoint is by taking a piece of string and tying it to two of the table’s legs directly across from each other. Make sure the string is pulled taught so the string is as straight as possible.
With the string as a guide, take a chalk pencil and draw a straight line where you believe the center of the table to be. This doesn’t have to be perfect by any means because once you repeat this process with the other two legs of the table, the midpoint will become clear.
Untie the string and repeat the process using the other two opposite legs of the table. After you’ve drawn your line, remove the string. There will be a cross where the two lines meet. This is your midpoint and where the center of your stencil should be placed! How easy was that?
Stenciling Your Side Table
Now it’s time to get your stencil on! Place your Abundance Mandala Stencil in your side table, allowing the center of the stencil to rest on the midpoint of your table. Don’t be afraid to bend your stencil to make it conform with the shape of your table. Sometime furniture can be oddly shaped but the best part about stencils is they are flexible!
Evenly coat your 4” stencil roller with paint and offload any excess paint onto a paper towel. This is one of the most important steps when it comes to stenciling! The number one mistake is having too much paint on your stencil roller or brush which can cause paint seepage. The goal is to have your stencil roller evenly covered with paint but to be almost dry to the touch. For more in-depth instructions, check out our How To Stencil section on our website!
Apply light pressure to your stencil roller when stenciling. It’s best to apply thin layers of paint to your mandala stencil to help reduce bleed. Plus, you can always go back and add another coat if necessary!
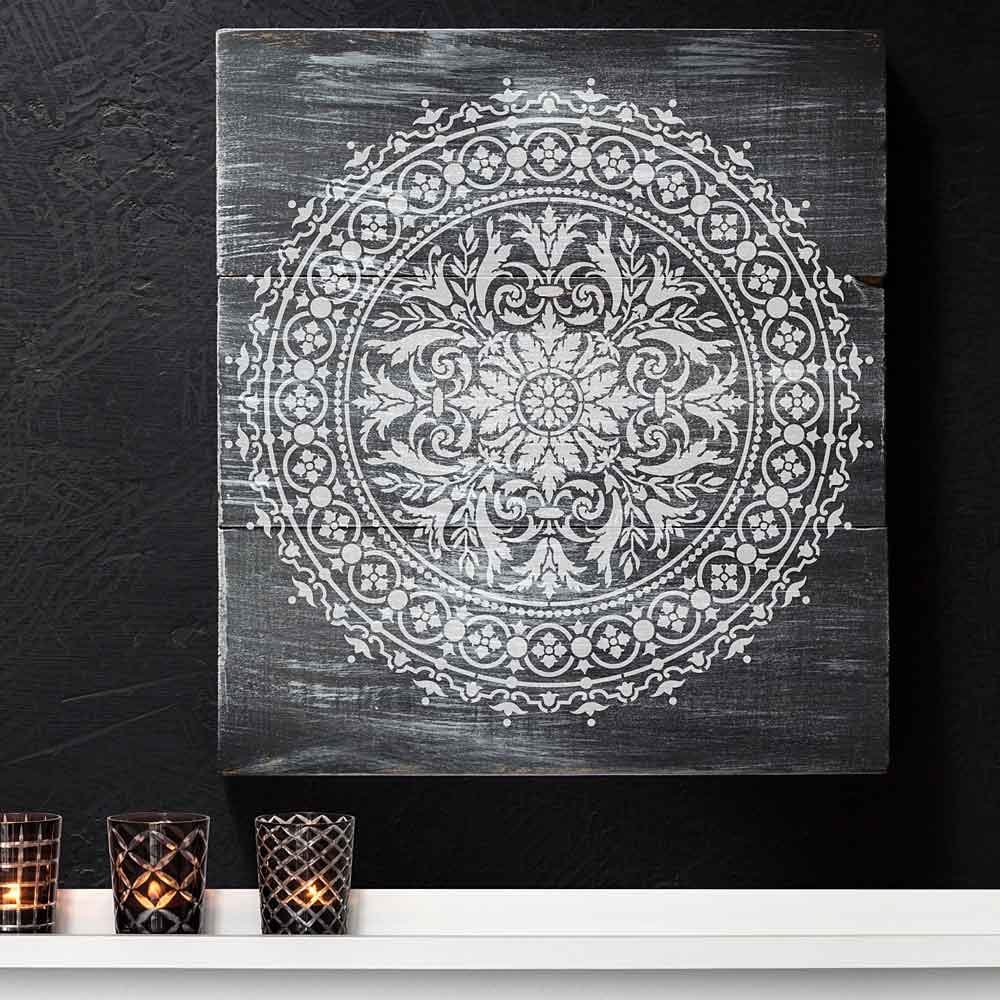
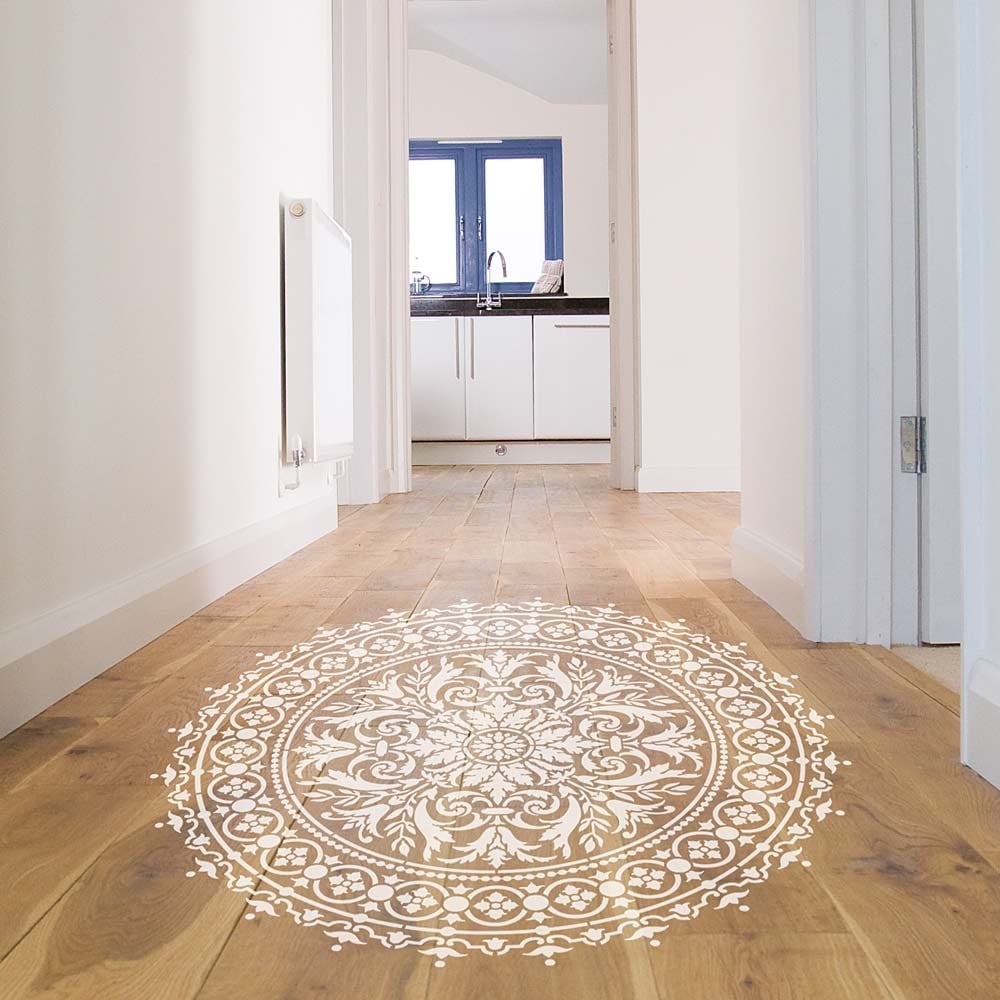
Peel back the stencil to reveal this gorgeous mandala! Such an intricate design can be easily created with just a stencil.
Sealing Your Stenciled Side Table
Now that your side table is stenciled, wait for the paint to dry completely. To seal your table and prevent damage we suggest using 2-3 coats of water-based polyurethane. Take a 4” stencil roller or a nylon paintbrush and work the polyurethane from one side to the other. The surface should be wet and easy to manipulate throughout the process. Make sure each coat dries before applying the next. Pro Tip: check the sides of your table for any excess polyurethane that could have dripped over during the process.
Check out the video to see the steps in action:
This stenciled mandala side table looks fabulous! And the best part is it only took about an hour. Where would you put this stenciled side table? Let us know in the comments below! Can’t get enough of Cutting Edge Stencils:


 With a bit of denatured alcohol on a paper towel, remove any dust or grease that might be on the surface of the table. No need for your paper towel to be soaked with denatured alcohol. Only a small amount is necessary.
 For all of the supplies used for this stencil project, check the list below:

 With the string as a guide, take a chalk pencil and draw a straight line where you believe the center of the table to be. This doesn’t have to be perfect by any means because once you repeat this process with the other two legs of the table, the midpoint will become clear.
 Untie the string and repeat the process using the other two opposite legs of the table. After you’ve drawn your line, remove the string. There will be a cross where the two lines meet. This is your midpoint and where the center of your stencil should be placed! How easy was that?
 Evenly coat your 4” stencil roller with paint and offload any excess paint onto a paper towel. This is one of the most important steps when it comes to stenciling! The number one mistake is having too much paint on your stencil roller or brush which can cause paint seepage. The goal is to have your stencil roller evenly covered with paint but to be almost dry to the touch. For more in-depth instructions, check out our How To Stencil section on our website!
Apply light pressure to your stencil roller when stenciling. It’s best to apply thin layers of paint to your mandala stencil to help reduce bleed. Plus, you can always go back and add another coat if necessary!
Evenly coat your 4” stencil roller with paint and offload any excess paint onto a paper towel. This is one of the most important steps when it comes to stenciling! The number one mistake is having too much paint on your stencil roller or brush which can cause paint seepage. The goal is to have your stencil roller evenly covered with paint but to be almost dry to the touch. For more in-depth instructions, check out our How To Stencil section on our website!
Apply light pressure to your stencil roller when stenciling. It’s best to apply thin layers of paint to your mandala stencil to help reduce bleed. Plus, you can always go back and add another coat if necessary!
 Peel back the stencil to reveal this gorgeous mandala! Such an intricate design can be easily created with just a stencil.

 Sealing Your Stenciled Side Table
 Check out the video to see the steps in action:
 This stenciled mandala side table looks fabulous! And the best part is it only took about an hour. Where would you put this stenciled side table? Let us know in the comments below! Can’t get enough of Cutting Edge Stencils: