Accessibility Statement
Our Commitment to Accessibility
We are committed to ensuring digital accessibility for people with disabilities. We are continually improving the user experience for everyone, and applying the relevant accessibility standards to help users with various disabilities access our website effectively.
Compliance Status
Our website strives to conform to the Web Content Accessibility Guidelines (WCAG) 2.1 Level AA standards. We also aim to be compliant with the Americans with Disabilities Act (ADA) and the European Accessibility Act requirements. These guidelines and regulations explain how to make web content more accessible to people with a wide range of disabilities. We acknowledge that some aspects of our website may not yet achieve full compliance, and we are actively working to address these areas.
Accessibility Features Available
Our website implements the Accessibly App, which provides a variety of tools to enhance website accessibility:
Visual Adjustments
- Bigger Text: Increase text size up to 3x for better readability (WCAG 2.1/1.4.4)
- Bigger Cursor: Enhanced cursor visibility for easier navigation
- Color Adjustments: Invert colors, adjust contrast, brightness, and saturation
- Grayscale Mode: Convert website to grayscale for users with visual impairments
- Hide Images: Reduce visual distractions for easier reading
Reading and Navigation Aids
- Reading Line: Adds a guide line to help follow text
- Reading Mask: Places a mask over text to isolate lines and enhance focus
- Readable Fonts: Converts to highly legible fonts for better comprehension
- Highlight Links: Makes links more prominent for easier navigation
- Dyslexic Fonts: Special typography for users with dyslexia
- Page Structure: Simplified layout options for easier navigation
Assistive Technologies
- Keyboard Navigation: Full website control using keyboard (Tab, Shift+Tab, Enter)
- Alt Text for Images: AI-generated image descriptions where manual ones aren't provided
- Read Page Aloud: Text-to-speech functionality
- Stop Animations: Pause motion content for users with vestibular disorders
Limitations and Feedback
Despite our best efforts to ensure accessibility, there may be some limitations. Content provided by third parties, user-generated content, or certain legacy pages may not be fully accessible. We are continuously working to improve our website's accessibility.
We welcome your feedback on the accessibility of our website. If you encounter any barriers or have suggestions for improvement, please contact us. We are committed to addressing these issues promptly.
Technical Information
The accessibility features on this website are provided through the Accessibly App, which utilizes several technologies including HTML, CSS, JavaScript, and various frameworks to enhance accessibility. Our implementation strives to be compatible with major screen readers and assistive technologies.
Legal Disclaimer
While we strive to adhere to WCAG 2.1 Level AA standards and provide accessible content, we cannot guarantee that our website will be accessible to all users under all circumstances. This website is provided 'as is' without any representations or warranties, express or implied.
In no event shall we be liable for any damages arising from or related to:
- Inability to access or use the website
- Any alleged non-compliance with accessibility laws or regulations
- Any disruption or errors in the functionality of accessibility features
By using this website, you agree to hold us harmless from any claims related to website accessibility issues. We are committed to addressing accessibility barriers in good faith but cannot guarantee immediate resolution in all cases.
Contact Us
If you have any questions about our accessibility efforts or encounter any barriers while using our website, please contact us.
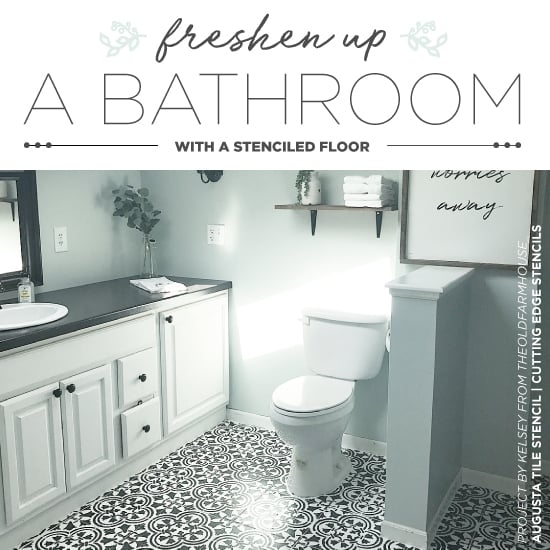
 We'd like to introduce Haley, a fashion stylist by day and a creative DIYer inspiring others with her blog Me and Mr. Jones. Haley and her husband plan to update the flooring in their home someday. She thinks her bathroom floor is simply hideous but new tile flooring is just not in the budget. She said, "The original tile had a yellow tone to it and was killing my black and white interior decor dreams!" Since she had seen several stenciled floor tutorials, she felt like she could do it! She browsed our large collection of Tile Stencils and fell in love with the Augusta Tile Design. She said, " I love how trendy this tile stencil is, but classic when done in black and white. "
  For the complete tutorial, links to the products she used, and all of Haley's tips, please read her blog Me and Mr. Jones. We're going to quickly review her project and show off her great results. Haley properly prepped her bathroom floor and made sure she cleaned the tile and grout. She primed the floor using Kilz primer and painted it using Rustoleum Chalked Paint in Linen White.
  Next she was ready to start stenciling. Haley placed her Augusta Tile pattern on the floor and used blue painter's tape to hold it in place. She painted the pretty tile pattern in Renaissance Furniture Chalk Paint in Midnight Black using a stencil brush.
  If you are recreating this project at home, be sure to brush off any excess paint on a piece of paper towel. Too much paint will cause the design to bleed. Here's a great video showing how Haley stenciled her floor. After the stencil was complete, Haley applied a clear coat of Minwax Polycrylic in Satin to ensure her stenciled floor was durable. Are you ready for the big reveal?
  Haley had this to say about her stencil project, " We LOVE how it turned out and it hasn't scratched or chipped yet (it's been painted for about 3 weeks now)." Here is a great before and after shot!
  Tell us, which tile stencil pattern would you use on your floor? We'd love to read your thoughts in the comments below. Haven't had enough stencil fun?


