DIY Cement Floor Makeover
Painted Cement Tile Without Breaking the Bank
Good day, my
Cutting Edge Stencil friends! Have you been looking to re-do the basement but unsure what to do with that dirty Cement Floor? Using our popular
Alhambra Tile Allover Stencil, we will show you the way to create a
DIY Painted Tile design. This project is simple, affordable, AND gives all rooms that extra flair! We can give you the high-end look of Painted Floor Tiles without putting a dent in your wallet! Yay! Let's go over these
Floor Stenciling techniques, step by step!

Erika, our crafty guru here at Cutting Edge Stencils, works her magic in this tutorial once again! We cannot get enough of this trend for
DIY painted cement floors. There are so many options for stencils and endless color variations to choose from. Using a few simple tricks she has up her sleeve and the
Alhambra Tile Allover Stencil, these warehouse floors got the makeover they truly deserve! Check it out: The first
important step is clearing the floor of dust and debris to ensure a flat surface! Erika then primed the floors using our go-to STIX Bonding Primer by Insl-x. STIX Primer adheres to the cement floors and provides a perfect base for painting and stenciling. Very important! Once dried, Erika applies a base coat of Benjamin Moore Navajo White Flat paint! It's a simple color but adds a bold base that we love! Once complete, the fun part can begin!


Erika chose our popular Alhambra Tile Stencil for this project. It is a stylish design with trendy Turkish and Moorish influences. This will guarantee her high-end
Painted Tile Floor design without breaking the bank! Erika then sprays the back of her stencil with Odif Ruler Grip Adhesive Spray, which we love to use for our projects. You can find any repositionable spray adhesive at your local craft store such as
Michaels. She places the stencil on the cement floor and uses a 4" dense foam roller to paint Benjamin Moore's new color 'Stone' to fill in the tile! Be careful not to overload your roller in paint because you don't want it to bleed.

After each section was painted over, Erika would peel back the stencil and align it with the stencils easy to use registration marks so she can paint the entire cement floor evenly. Once the entire cement floor was stenciled over, she completes the project by applying two coats of water-based Polyurethane. Adding these coats increases the
protection and
durability of the stencil- You don't want to forget that step! Let's just take a moment to appreciate how her hard work has paid off!

So, just like that! Erika has completely changed these dirty cement floors into the look of beautiful floor tile with this simple
stencil design. This fun
DIY Cement Floor Makeover can change the look of your house! It will give you an expensive look without breaking the bank. Who doesn't love the sound of that?! Plus you can feel good in knowing that YOU created this masterpiece yourself! Where would you add this stencil in your home? Comment below with your thoughts! Loving the look of this stenciled floor?
Happy stenciling and Have a great weekend! -The Cutting Edge Stencil Crew
 Erika, our crafty guru here at Cutting Edge Stencils, works her magic in this tutorial once again! We cannot get enough of this trend for DIY painted cement floors. There are so many options for stencils and endless color variations to choose from. Using a few simple tricks she has up her sleeve and the Alhambra Tile Allover Stencil, these warehouse floors got the makeover they truly deserve! Check it out: The first important step is clearing the floor of dust and debris to ensure a flat surface! Erika then primed the floors using our go-to STIX Bonding Primer by Insl-x. STIX Primer adheres to the cement floors and provides a perfect base for painting and stenciling. Very important! Once dried, Erika applies a base coat of Benjamin Moore Navajo White Flat paint! It's a simple color but adds a bold base that we love! Once complete, the fun part can begin!
 Erika chose our popular Alhambra Tile Stencil for this project. It is a stylish design with trendy Turkish and Moorish influences. This will guarantee her high-end Painted Tile Floor design without breaking the bank! Erika then sprays the back of her stencil with Odif Ruler Grip Adhesive Spray, which we love to use for our projects. You can find any repositionable spray adhesive at your local craft store such as Michaels. She places the stencil on the cement floor and uses a 4" dense foam roller to paint Benjamin Moore's new color 'Stone' to fill in the tile! Be careful not to overload your roller in paint because you don't want it to bleed.
  After each section was painted over, Erika would peel back the stencil and align it with the stencils easy to use registration marks so she can paint the entire cement floor evenly. Once the entire cement floor was stenciled over, she completes the project by applying two coats of water-based Polyurethane. Adding these coats increases the protection and durability of the stencil- You don't want to forget that step! Let's just take a moment to appreciate how her hard work has paid off!
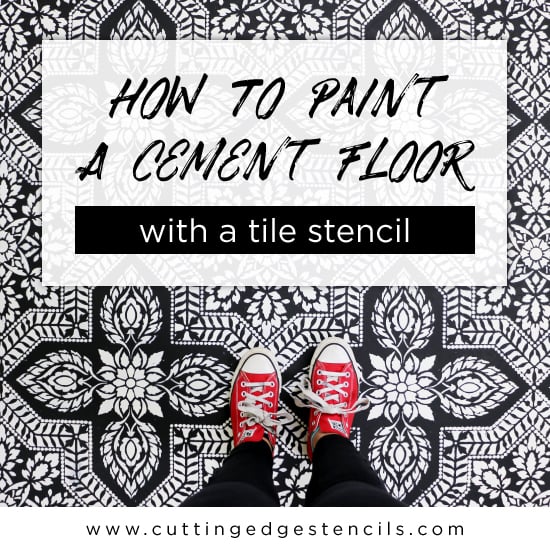
  So, just like that! Erika has completely changed these dirty cement floors into the look of beautiful floor tile with this simple stencil design. This fun DIY Cement Floor Makeover can change the look of your house! It will give you an expensive look without breaking the bank. Who doesn't love the sound of that?! Plus you can feel good in knowing that YOU created this masterpiece yourself! Where would you add this stencil in your home? Comment below with your thoughts! Loving the look of this stenciled floor?


